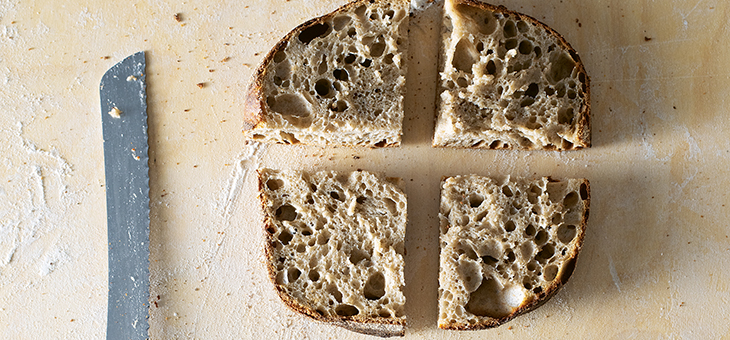
If social isolation has given us anything, it’s the time to get the baking sheets out. And amongst the multiple banana breads, cheese scones and chocolate brownies we’ve been churning out, a subset of new enthusiasts has risen up, devoted entirely to the very serious business of making of sourdough.
Butter-slathered, supermarket sliced is all very well, but a crisp-crusted sourdough loaf you coaxed into life from just a handful of flour, a little water and natural yeast captured floating in the air (which together make your sourdough starter), is something else altogether.
In fact, caring for a sourdough starter can swiftly become an important part of your week. But once your starter is established, well-fed and bubbling happily like a live, beige Tamagotchi, where do you go from there? It’s easy to forget bread is, in fact, the end goal.
This is when you pick up Super Sourdough by former Great British Bake Off contestant and NHS doctor James Morton. His pave rustique will see you through.
How to make a pave rustique from Super Sourdough by James Morton
Ingredients:
(Makes 2 small loaves)
- 100g rye (or white) sourdough starter (if you don’t have one you’ve made yourself, you can buy them online – just look for a reputable bakery or baker)
- 400g strong white flour, plus extra for dusting
- 50g wholemeal flour
- 330g tepid-warm water
- 10g table salt
- Semolina, for dusting
Method:
1. Start by taking your sourdough starter out of the fridge about 8–14 hours before you want to bake. If it hasn’t been fed recently or its activity has waned, give it a feed when you take it out.
2. In a large bowl, weigh your flours. Add in your sourdough starter. Mix warm and cool water in a jug to get approximately 25ºC (colder than a swimming pool, warmer than tepid), and pour this in. Mix everything together very roughly until you have a lumpy dough – use a wooden spoon, your hands or a dough hook.
3. Let the dough rest for about 20–30 minutes – this short autolyse will help it come together much better. Ideally, cover the bowl with a damp tea towel or a plate to stop it drying out.
4. Add your salt, and then mix your dough – I’d recommend trying it by hand. The slap and fold method works very well. You want to develop the gluten well here – at least 10 minutes of mixing. Alternatively, you can stretch and fold the dough and then repeat this at least every hour of the prove until it seems strong.
5. Wrap your bowl in a couple of large tea towels to keep it warm and stop the dough from drying out. Leave in a relatively warm place for about four hours or so. If you aren’t stretching and folding every hour, a single stretch and fold about two hours in would be beneficial for the dough’s strength.
6. Once your dough is looking larger and quite aerated, it’s ready to shape. Don’t worry about pre-shaping. Flour a work surface, and a couche or heavy tea towel at the same time (you can use a square proving basket if you have one). Turn your dough gently out onto the surface – use a dough scraper to cleanly separate it from the side of the bowl so as not to stretch the dough too much. Divide the dough by cutting in half using your dough scraper. Dust your hands lightly in flour to stop them from sticking to it.
7. With floury hands, gently stretch out each dough into a large square. Be careful not to tear it. You want each to be about 20cm (8in) square. Then fold the dough in half so that it makes a rectangle and it has floury sides on the top and bottom. If it has stuck, use your scraper and add more flour. Brush off any excess flour from the top, and fold it in half again, gently pressing and holding to make the surfaces stick together. You’ve now got a lightly shaped, wet, aerated square loaf.
8. Use a scraper, or your hands if it hasn’t stuck, to lift the dough onto your floured couche. You can use anything hefty and square-edged (a book will do) on each side to keep it supported as it proves for one to two more hours. You want it to grow by about half again.
9. Preheat your oven 30–40 minutes before you think it will be ready if it has a stone or heavy baking surface inside. You can bake these loaves inside a pot or cloche – just make sure it’s going to fit. Alternatively, use a baking tray. Go for 250ºC/230ºC fan/Gas 9.
10. Dust a tray or board with semolina when you’re ready to bake, and then dust some more semolina onto your proven dough. Get your hands under your couche and flip the dough onto the tray, keeping all the bubbles inside. Score gently – I like to use one diagonal line. Transfer to the oven and add steam using your chosen method – I’d pour some water into a cast-iron pan that’s sitting in the bottom of the oven, or bake under a lid or cloche. Turn the oven down to 230ºC/210ºC fan/Gas 8. Bake for 20 minutes and then either vent the oven by opening the door and allowing the steam to escape, or remove the lid or cloche, and bake for another 30 minutes, or until a deep golden. Cool for at least 30 minutes before eating.
Super Sourdough by James Morton is published by Quadrille and available from Dymocks, priced $39.99. Photography Andy Sewell. Available now.
Have you jumped on the sourdough train?
– With PA
If you enjoy our content, don’t keep it to yourself. Share our free eNews with your friends and encourage them to sign up.
Related articles:
https://www.yourlifechoices.com.au/food-recipes/recipes/rising-to-the-occasion
https://www.yourlifechoices.com.au/food-recipes/recipes/easy-carrot-cake
https://www.yourlifechoices.com.au/food-recipes/recipes/super-spinach-pancakes

