Digital photography has improved by leaps and bounds over the past few years, with the popularity of easy-to-use smartphone cameras overtaking the use of traditional cameras. The simplicity of the modern phone camera makes it easy to point and shoot. But are you a hobby photographer who wants to take your photo-editing skills to the next level? If so, then our free hobby photography tutorials may be of interest to you.
There are many photo-manipulation programs around, such as Photoshop or Paint, but we’ve found one that you can use for free, regardless of the type of computer you use. It’s called Editor by Pixlr, and it requires no tricky download or installation – and you can use it in your favourite web browser. Editor by Pixlr is an easy-to-use photo-manipulation program that even has a couple of handy smartphone and tablet apps you can use if you don’t have access to a computer. For now, we’ll use the desktop version. Click here to start using Editor by Pixlr.
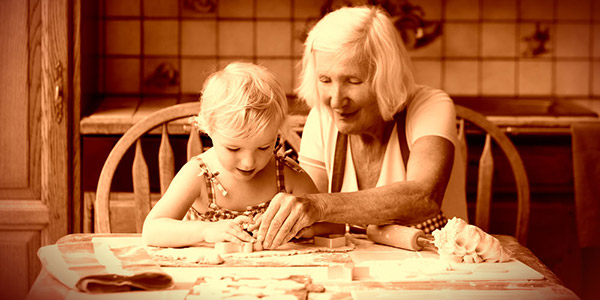
To get you acquainted with Pixlr’s interface, we look at how to apply a sepia tone to an image. The sepia toning effect gives your new digital photographs a classic, old-style look – and, can make for a great family gift idea or lend a traditional aesthetic to your favourite social media page.

Now, let’s choose an image with which to work. Open up the Pixlr Editor app in your web browser, and go to ‘Open image from computer’ (there are other options, but we’ll stick with an image from your computer for now). Find your image and click ‘Open’.

Now that you have your image, it’s time to give it that old sepia feeling.

Go to ‘Adjustment’, which is in the menu options section that sits atop the app window. Scroll down to ‘Sepia’ and click.

And voila! Your image now has a sepia tone, which looks nice as it is, but let’s give the photo a more classic touch. To do that, we need to play around with the levels.

So, go to the ‘Adjustment’ menu option, then scroll down and click ‘Levels’.

A small dialogue box will appear. There are three tabs at the bottom of the level graph displayed inside the box. These tabs change the levels of the shadows, midtones and highlights in your image. The small black tab at the bottom left will adjust your shadows, which are the darker parts of your image. The grey tab in the middle adjusts your midtones, which are, you guessed it, the colours (or tones) in between the shadows and the highlights. And the white tab on the right adjusts your highlights, which are the brightest parts of your image. Sliding the black tab towards the middle of the level ‘graph’ will make the darkest parts of your image darker, depending on how far into the middle you drag the tab. Sliding the grey tab left will lighten your image, and if you slide to the right, it will darken. And, finally, sliding the white tab in towards the middle will increase the whiteness of the overall image. Try playing around with the levels until you are happy with the look of your photo.

Old photographs tend to be underexposed, so, for this exercise, let’s get that image a little darker than the standard levels. To do this, drag the black tab and the grey tab to the right, and the white tab to the left, just as it is in the above image.
There you have it – a photograph with a sepia tone. You can print or share, or simply save it to your photo library. To do this, go to ‘File’ and select the option you prefer.
Next time, we’ll look at how to make a duotone photograph, and we’ll show you how to place a vignette around the image – to give it an even more old-world feeling. Why not play around with toning a few images and see how you go in the meantime?
If you have any questions about how to manipulate your favourite photographs, send an email to [email protected], and we’ll put together an easy tutorial for you.

